
Create Your Own Luxurious Spa Experience at Home
Who doesn’t love a luxurious spa experience? Relaxing in a warm bath, surrounded by bubbles, soothing scents, and soft lighting can be the ultimate indulgence. But did you know that you can recreate this experience at home with DIY bath bombs? These fizzy, fragrant treats are easy to make, customizable to your preferences, and can provide a wonderful addition to your self-care routine. In this blog post, we’ll explore the benefits of using DIY bath bombs, as well as provide a step-by-step guide to creating your own luxurious spa experience at home.
Benefits of Using DIY Bath Bombs
1. Promotes Relaxation
One of the primary benefits of using DIY bath bombs is their ability to promote relaxation. The combination of warm water, fragrant essential oils, and soothing scents can help to calm the mind and body, reducing stress and anxiety. In addition, the fizzy texture of bath bombs can provide a tactile sensory experience, which can also help to ease tension and promote relaxation.
2. Nourishes and Hydrates the Skin
Another benefit of using DIY bath bombs is their ability to nourish and hydrate the skin. Many bath bomb recipes include natural ingredients like coconut oil, shea butter, and Epsom salts, which can help to moisturize and soothe dry, irritated skin. In addition, some recipes may include skin-nourishing herbs and flowers, such as lavender or rose petals, which can provide additional benefits to the skin.
3. Customizable to Your Preferences
DIY bath bombs are also highly customizable, allowing you to create a personalized spa experience that suits your preferences. From choosing your favorite essential oils to adding natural coloring agents, you can create a unique and indulgent bath bomb that perfectly fits your tastes.
Creating Your Own Luxurious Spa Experience at Home
Now that we’ve explored the benefits of using DIY bath bombs, let’s take a look at how to create your own luxurious spa experience at home.
1. Gather Your Ingredients
The first step in creating your own DIY bath bombs is to gather your ingredients. This will typically include baking soda, citric acid, a natural oil like coconut or sweet almond oil, essential oils, and any additional ingredients you want to include, like herbs or flowers. You will also need a mixing bowl, whisk, and a bath bomb mold.
2. Mix Your Ingredients
Next, mix your dry ingredients (baking soda and citric acid) together in a mixing bowl. In a separate bowl, mix your wet ingredients (oil and essential oils) together. Slowly add the wet ingredients to the dry ingredients, whisking constantly to prevent clumping. You may also add any additional ingredients at this time, such as herbs or flowers.
3. Form Your Bath Bombs
Once your ingredients are fully mixed, it’s time to form your bath bombs. Take your bath bomb mold and fill one half with the mixture, pressing down firmly. Fill the other half with the mixture and press down again to form a complete bath bomb. Let the mixture sit in the mold for a few minutes, then carefully remove the bath bomb from the mold.
4. Let Your Bath Bombs Dry
After forming your bath bombs, let them dry for at least 24 hours in a cool, dry place. Once dry, you can store them in an airtight container until ready to use.
5. Enjoy Your Spa Experience
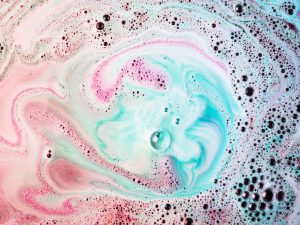
To enjoy your spa experience, simply drop one or two bath bombs into a warm bath and watch them fizz and release their fragrant scents. Soak in the bath for at least 20 minutes, allowing the natural ingredients to nourish and hydrate your skin and promote relaxation.
Conclusion
DIY bath bombs are a wonderful way to create your own luxurious spa experience at home. With their ability to promote relaxation, nourish the skin, and be fully customizable to your preferences, they are a simple yet effective addition to any self-care routine. Whether you prefer calming lavender or invigorating peppermint, you can create a bath bomb that perfectly fits your tastes and needs. So why not try making your own DIY bath bombs today and experience the ultimate indulgence in the comfort of your own home?
Tips for Making DIY Bath Bombs:
- Start with a basic recipe and experiment with different essential oils and natural ingredients.
- Use high-quality, natural ingredients to ensure the best results.
- Use a bath bomb mold for the best results, or try using silicone molds or muffin tins as an alternative.
- Be patient and allow your bath bombs to dry completely before using them.
- Store your bath bombs in an airtight container in a cool, dry place to prolong their shelf life.
With these tips and our step-by-step guide, you can create your own personalized spa experience with DIY bath bombs. Take the time to relax and unwind with a warm, fragrant soak, and enjoy the benefits of these luxurious treats for your mind and body.