Step Up Your Glam

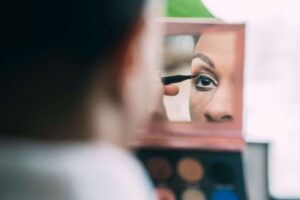
The allure of a perfectly executed winged eyeliner is undeniable. This classic makeup technique has stood the test of time, adding a touch of drama and sophistication to any look. However, for many, achieving that flawless wing can be a daunting task. Fear not, beauty enthusiasts, as we unveil foolproof tips that will guide you through the art of creating the perfect winged eyeliner. Get ready to elevate your eye game and embrace the elegance of a well-defined wing.
1. Start with the Right Tools
Before diving into the application process, ensure you have the right tools at your disposal. A high-quality, fine-tip liquid eyeliner or a gel eyeliner with an angled brush is essential for precision. The choice between liquid and gel depends on personal preference, as both can deliver stunning results. However, beginners may find a liquid liner with a felt-tip applicator easier to control.
Additionally, have cotton swabs or makeup remover on hand for quick corrections. Perfecting your wing may take a few attempts, and having these tools nearby will save you from starting over if a little mishap occurs.
2. Map Out Your Wing
Creating a symmetrical wing requires a bit of planning. Start by identifying the endpoint of your wing. Imagine a line extending from the outer corner of your eye towards the tail end of your eyebrow – this will be your guide. The length of the wing is subjective and can be adjusted based on your desired level of drama.
To map out the wing, use a light, neutral-colored eyeliner or eyeshadow pencil. Begin by drawing a small line extending from the outer corner of your eye, following the imaginary line you’ve created. This initial line will serve as the base for your wing.
Next, draw a line connecting the endpoint of your first line back towards your upper lash line, forming a triangular shape. The size of this triangle will determine the thickness of your wing. Once satisfied with the shape, you can fill in the outline to complete the wing.
Pro tip: Practice creating the wing on both eyes simultaneously to ensure symmetry. Small adjustments can be made during the mapping process to achieve balanced wings.
3. Take it Step by Step
Achieving the perfect wing is all about taking it one step at a time. Break down the process into smaller, more manageable steps to maintain control and precision.
Begin by lining your upper lash line as you normally would, starting from the inner corner and gradually thickening the line as you move outward. Once you reach the outer corner, connect the line to the endpoint of your mapped-out wing, creating a smooth, continuous line.
Fill in the wing by carefully coloring within the mapped-out shape. For liquid eyeliner, use short strokes to build up the intensity gradually. If you’re using gel eyeliner, an angled brush can provide more control for precise application.
If you’re new to winged eyeliner, consider using a pencil or eyeshadow to practice the initial lining and mapping steps. This allows for easier corrections and adjustments before committing to a liquid or gel formula.
4. Embrace Tape as a Guide
For those seeking an extra level of precision, tape can be a helpful tool. Take a small piece of scotch tape and place it at an angle extending from the outer corner of your eye towards the tail of your eyebrow. This creates a clean edge and serves as a guide for your wing.
Apply your eyeliner along the lash line, extending it to meet the edge of the tape. Once the liner is in place, carefully peel away the tape to reveal a sharp, defined wing. This technique is especially useful for achieving a crisp, straight line and can be a confidence booster for beginners.
5. Correct and Refine
Even the most seasoned makeup artists make mistakes, so don’t be discouraged if your first attempt isn’t flawless. The key is to have patience and the tools to make corrections.
Use a cotton swab dipped in makeup remover to clean up any uneven lines or smudges. Precision is crucial, so take your time and make small adjustments as needed. Q-tips with a pointed tip can be particularly useful for refining the shape of your wing.

Once you’ve corrected any imperfections, set your winged eyeliner with a translucent setting powder to prevent smudging throughout the day. This final step ensures that your hard work stays intact, leaving you with a long-lasting, picture-perfect wing.
Mastering the art of the perfect winged eyeliner requires practice, patience, and the right techniques. Armed with the correct tools, a mapped-out plan, and a step-by-step approach, you can confidently achieve a flawless wing that enhances your eyes and adds a touch of glamour to your makeup routine. Remember, each attempt is a step toward perfection, so embrace the learning process and enjoy the transformative power of the perfect winged eyeliner.

