
Glow Up Naturally
In the realm of natural beauty, where the earth’s bounty becomes the foundation for radiant skincare, one gem stands out – raspberry seed oil. Packed with antioxidants, essential fatty acids, and vitamins, this golden elixir holds the promise of nourishing and rejuvenating the skin. Join us on a journey from berries to glow as we explore the art of making your own raspberry seed oil. This step-by-step guide unlocks the secrets of this DIY beauty endeavor, inviting you to harness the power of nature for a luminous complexion.
Derived from the tiny yet potent seeds of raspberries, raspberry seed oil is a skincare powerhouse. Rich in linoleic and alpha-linolenic acids, vitamin E, and antioxidants, this oil is renowned for its ability to moisturize, protect, and promote skin elasticity. Making your own raspberry seed oil ensures a pure and unadulterated potion that captures the essence of these vibrant berries.
Gather Your Supplies
Before embarking on the journey of crafting your raspberry seed oil, gather the necessary supplies. Here’s what you’ll need:
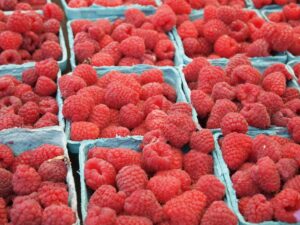
- Fresh or Frozen Raspberries: Opt for organic raspberries to ensure the purity of your oil.
- Carrier Oil: Choose a high-quality carrier oil like jojoba, sweet almond, or olive oil to extract and dilute the raspberry seed oil.
- Double Boiler or Slow Cooker: For a gentle and controlled heating process.
- Cheesecloth or Fine Mesh Strainer: To strain out the raspberry seeds and pulp.
- Glass Jar: A clean, dry glass jar for storing your finished raspberry seed oil.
Extracting Raspberry Seed Oil
- Prepare the Raspberries: Wash the raspberries thoroughly and allow them to air dry. If using frozen berries, make sure they are fully thawed.
- Maceration Process: Place the raspberries in a bowl and gently crush them using a fork or a potato masher. This process, known as maceration, helps release the natural oils from the seeds.
- Carrier Oil Addition: Transfer the crushed raspberries into a glass jar and cover them with your chosen carrier oil. Ensure that the oil fully covers the berries.
- Double Boiler or Slow Cooker Method: Set up your double boiler or use a slow cooker on the lowest setting. Allow the raspberry and oil mixture to heat gently for several hours. This slow, low-heat process extracts the beneficial compounds from the seeds.
- Straining the Oil: Once the maceration process is complete, strain the mixture using cheesecloth or a fine mesh strainer into a clean bowl or another glass jar. Squeeze out as much oil as possible from the raspberry pulp.
Infusing with Additional Ingredients
To elevate the skincare benefits of your raspberry seed oil, consider infusing it with complementary ingredients:
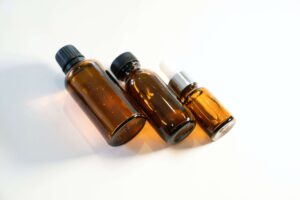
- Vitamin E Oil: Add a few drops of vitamin E oil for enhanced antioxidant properties and to prolong the shelf life of your DIY creation.
- Lavender or Chamomile Essential Oil: Infuse a calming element by adding a few drops of lavender or chamomile essential oil, known for their soothing effects on the skin.
- Rosehip Seed Oil: Boost the anti-aging properties by incorporating rosehip seed oil, which is rich in vitamins A and C.
- Frankincense Essential Oil: For added skin rejuvenation, a few drops of frankincense essential oil can impart a delightful aroma and anti-aging benefits.
Storing Your Raspberry Seed Oil
Transfer your infused raspberry seed oil into a clean, dry glass jar with a tight-fitting lid. Store it in a cool, dark place to preserve its potency. The addition of vitamin E and other antioxidants helps prevent oxidation, ensuring your DIY creation stays fresh for an extended period.
Now that you’ve crafted your raspberry seed oil, it’s time to weave it into your skincare routine:
- Cleansing Oil: Use the raspberry seed oil as a gentle and effective cleanser. Apply a small amount to your face, massage, and then wipe away with a warm, damp cloth.
- Moisturizer: Apply a few drops of raspberry seed oil as a moisturizer to nourish and hydrate your skin. It absorbs quickly, leaving a natural glow.
- Anti-Aging Serum: Harness the anti-aging properties by incorporating the oil into your nightly skincare routine. The antioxidants and essential fatty acids contribute to skin elasticity and resilience.
- Under Eye Treatment: Dab a drop or two of raspberry seed oil under your eyes to address puffiness and fine lines. Its lightweight texture makes it ideal for delicate areas.
- Body Oil: Extend the benefits beyond your face by using the oil as a full-body moisturizer. Apply it after a shower to lock in hydration.
The Beauty of DIY Skincare
Crafting your own raspberry seed oil not only brings forth a potent skincare elixir but also embodies the beauty of personalized self-care. By infusing it with additional ingredients tailored to your skin’s needs, you create a skincare ritual that is uniquely yours – a journey from berries to glow that celebrates the artistry and efficacy of DIY beauty.
“From Berries to Glow” is an ode to the richness of nature and the simplicity of DIY skincare. As you embark on the journey of making your own raspberry seed oil, let the vibrant essence of these berries infuse your beauty ritual with radiance. With each drop, you not only nourish your skin but also embrace the beauty of crafting a skincare elixir that is as unique and delightful as you are.