
From Cuticle to Coat
Your nails are like the finishing touch to a beautiful painting – they complete your look and add that extra bit of polish to your appearance. Whether you prefer a classic French manicure, bold nail art, or simply well-groomed nails, mastering the art of DIY manicures and nail care is a valuable skill that allows you to express your personal style and maintain healthy, beautiful nails at home. In this comprehensive guide, we’ll cover everything you need to know to nail your DIY manicure game.
1. Nail Care Basics
Before diving into the world of DIY manicures, it’s essential to start with a clean canvas. Here are some nail care basics to keep in mind:
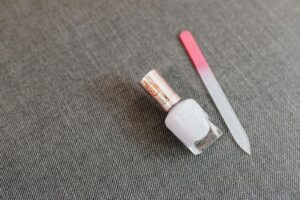
- Trimming and Shaping: Use a quality pair of nail clippers and a nail file to trim and shape your nails to your desired length and shape. Whether you prefer square, oval, or almond-shaped nails, ensure they are uniform in length for a polished look.
- Cuticle Care: Gently push back your cuticles using a cuticle pusher or orangewood stick to reveal more of the nail bed. Avoid cutting your cuticles, as this can lead to infection and irritation.
- Hydration: Keep your nails and cuticles hydrated by applying a nourishing cuticle oil or moisturizer regularly. This helps prevent dryness, cracking, and hangnails.
2. Preparing Your Nails
- Cleanse: Start by removing any old nail polish using a non-acetone nail polish remover to avoid drying out your nails. Then, wash your hands thoroughly with soap and water to remove any dirt, oil, or residue.
- Buff: Gently buff the surface of your nails with a nail buffer to smooth out any ridges and create a clean, even base for polish application. Be careful not to over-buff, as this can weaken the nails.
- Prime: Apply a base coat to your nails to help the polish adhere better and prevent staining. Choose a base coat that suits your specific nail needs, whether it’s strengthening, hydrating, or ridge-filling.
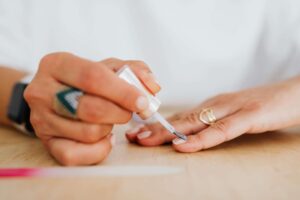
3. Perfecting Your Polish
Now comes the fun part – choosing your nail polish and applying it like a pro:
- Color Selection: Select your desired nail polish color and ensure it’s well-mixed by rolling the bottle between your hands. Consider the occasion, season, and your personal style when choosing a shade.
- Application: Start by applying a thin, even layer of polish to each nail, starting from the base and working your way to the tip. Allow the first coat to dry completely before applying a second coat for full opacity and coverage.
- Cleanup: Use a small brush dipped in nail polish remover to clean up any mistakes or polish that has gotten on your skin or cuticles. This creates a clean, professional-looking finish.
4. Finishing Touches
- Top Coat: Seal in your manicure with a high-quality top coat to add shine and extend the longevity of your polish. A quick-drying top coat can also help reduce drying time and prevent smudges.
- Hydrate: Finish off your DIY manicure by applying a hydrating hand cream or lotion to keep your hands and nails moisturized and soft. Massage the cream into your cuticles and hands for an indulgent treat.
5. Maintenance and Aftercare
- Touch-Ups: Keep your manicure looking fresh by touching up any chips or imperfections with a small brush and matching nail polish. This helps extend the life of your manicure between full polish changes.
- Protect: Wear gloves when doing household chores or activities that may damage your nails, such as gardening or washing dishes. This helps prevent chipping, peeling, and breakage.
- Take Breaks: Give your nails a break from polish occasionally to allow them to breathe and recover. Opt for a clear nail polish or simply keep them clean and moisturized during this time.
6. Troubleshooting Common Issues
- Smudging: To prevent smudges, wait at least two minutes between coats and avoid applying thick layers of polish.
- Streaking: Ensure your nail polish is well-mixed and apply thin, even coats to prevent streaking and uneven coverage.
- Quick-Drying: Speed up drying time by applying a quick-drying top coat or dipping your nails in cold water after painting them.
With these tips and tricks, you’ll be well-equipped to nail your DIY manicures and maintain beautiful, healthy nails at home. Whether you’re a beginner or a seasoned nail enthusiast, there’s nothing quite like the satisfaction of nailing the perfect manicure – pun intended. So, gather your favorite nail polish shades, put on some relaxing music, and treat yourself to a DIY manicure that’s as stylish as it is effortless. Happy nailing!