
Step-by-Step
Contouring has taken the beauty world by storm, transforming the way we enhance our facial features. While the process might seem daunting to beginners, with the right techniques and guidance, anyone can achieve a beautifully sculpted look. In this step-by-step tutorial, we’re breaking down the art of face contouring into simple, easy-to-follow steps. Whether you’re a makeup novice or looking to refine your skills, read on to master the art of face contouring.
Step 1: Gather Your Tools and Products
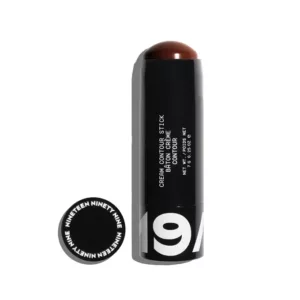
Before diving into contouring, it’s essential to gather the right tools and products. You’ll need a contouring product (cream, powder, or stick), a highlighting product, a fluffy blending brush, and a makeup sponge. Opt for shades that are slightly darker and lighter than your natural skin tone. Ensure your tools are clean and ready to use.
Step 2: Start with a Fresh Canvas
Begin your makeup routine with a clean, moisturized face. Apply your regular foundation as a base. You can also apply a lightweight, non-comedogenic primer to ensure a smooth canvas. Remember, a flawless contour starts with well-prepped skin.
Step 3: Identify Your Face Shape
Understanding your face shape is crucial for effective contouring. Common face shapes include round, oval, square, heart, and diamond. Each shape requires a unique approach to achieve the most flattering results. Take a moment to analyze your face shape in the mirror before proceeding.
Step 4: Contouring the Cheekbones
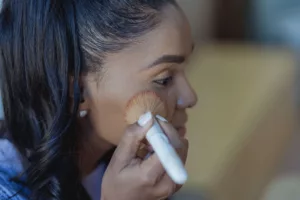
For a defined look, contouring the cheekbones is key. Using your chosen contouring product (cream or powder), apply the darker shade to the hollows of your cheeks. Follow the natural curve just below your cheekbones, blending upward and toward your hairline. Remember to start with a light application and build up the intensity gradually.
Step 5: Sculpting the Jawline
To create a more defined jawline, apply the contour shade along your jawline. Blend the product downward into your neck to avoid any harsh lines. This technique can help create the illusion of a slimmer and more sculpted jawline.
Step 6: Slimming the Nose
If you’re looking to make your nose appear slimmer, use the contouring shade to trace along the sides of your nose. Start from the inner corner of your eyebrows and blend gently. Be cautious not to make the lines too harsh; soft blending is the key to a natural effect.
Step 7: Highlighting the High Points
Now, it’s time to bring out the high points of your face. Take your highlighting product and apply it to the tops of your cheekbones, the bridge of your nose, the center of your forehead, and your cupid’s bow. This step adds dimension and luminosity to your look.
Fruit Pigmented® Gemmed Luminizer

Step 8: Blending is the Secret
The secret to a flawless contour lies in blending. Use a clean, fluffy blending brush to soften any harsh lines and seamlessly blend the contour and highlight shades. A well-blended contour appears natural and effortlessly enhances your features.
Step 9: Set with Translucent Powder
To ensure your hard work stays in place, lightly dust translucent powder over your contoured areas. This step helps to set the makeup and prevents any unwanted shifting throughout the day.

Remember, practice makes perfect. Don’t be discouraged if your first attempt isn’t flawless. The more you practice, the more confident and skilled you’ll become at contouring.
Face contouring is a skill that, once mastered, can transform your makeup routine and enhance your natural beauty. By following these step-by-step instructions, you’ve taken the first steps towards becoming a contouring pro. Remember to start with a clean canvas, identify your face shape, and take your time blending for a seamless finish. Whether you’re heading to a special event or simply want to enhance your everyday look, face contouring is a powerful technique that empowers you to define and sculpt your features with confidence.