
Step-by-Step

If you’re a makeup enthusiast, you probably know the exhilarating feeling of opening a perfectly organized and clean makeup collection. Not only does it make your beauty routine smoother, but it also ensures the longevity and hygiene of your precious products. In this blog post, we’ll dive into the essential steps for properly cleaning and organizing your makeup collection.
Step 1: Gather Your Makeup
Before you start the cleaning and organizing process, gather all your makeup items in one place. This will give you a clear overview of what you have and make it easier to decide what to keep, toss, or donate. Lay out all your makeup products on a clean surface like a table or vanity.
Step 2: Declutter
Now that you have all your makeup laid out, it’s time to declutter. Start by checking the expiration dates on your products. Makeup products have a shelf life, and using expired items can lead to skin issues. Toss anything that’s past its prime.
Next, assess the items you rarely use or no longer enjoy. If you haven’t touched a product in the past six months, it might be time to part ways with it. Consider donating gently used makeup to friends or shelters if it’s still in good condition.
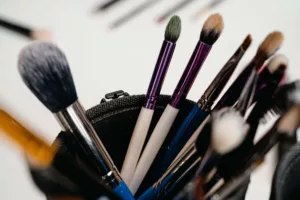
Step 3: Clean Your Makeup
Once you’ve decluttered, it’s time to clean your makeup items. This step is crucial for maintaining the hygiene of your collection. Here’s how to clean different types of makeup products:
- Powders (Eyeshadows, Blushes, etc.): Use a clean makeup brush or a tissue to gently remove the top layer of the product. This will get rid of any oils or impurities on the surface.
- Brushes and Sponges: Regularly clean your brushes and sponges with a mild brush cleanser or baby shampoo. Rinse them thoroughly and allow them to dry completely before using them again.
- Liquid and Cream Products: Wipe down the exterior of liquid and cream products with a damp cloth or makeup wipe. Be careful not to introduce moisture into the product itself.
- Lipsticks and Lip Glosses: Sanitize the surface of lipsticks with rubbing alcohol. You can also gently scrape off the top layer with a clean tissue.
- Mascara and Eyeliners: Replace these items every three to six months to avoid eye infections.
Step 4: Organize Your Makeup
Now that your makeup is clean and decluttered, it’s time to organize it in a way that makes sense to you. Consider these tips:
- Use Clear Containers: Transparent containers or acrylic organizers are ideal for makeup storage. They allow you to see all your products at a glance.
- Categorize: Group similar products together. For example, keep all your lip products in one section and your eyeshadows in another.
- Drawer Dividers: If you have a vanity with drawers, use dividers to separate and categorize your products.
- Labeling: Consider labeling your containers or drawers, especially if you have a large collection. This makes it easy to find what you need quickly.
- Display Your Favorites: Showcase your favorite or most-used products on your vanity for easy access.
Step 5: Maintain Your Collection
The key to an organized makeup collection is maintenance. Make it a habit to clean and declutter your collection every few months. This prevents products from piling up and becoming overwhelming.
A well-organized and clean makeup collection not only looks aesthetically pleasing but also ensures that your products remain safe and effective. By following these steps for cleaning and organizing your makeup, you’ll create a makeup haven that makes your beauty routine more enjoyable and efficient. Plus, it’ll be easier to resist the temptation of buying duplicates when you can clearly see what you already own. Happy organizing!