
The Science of Beauty
When it comes to achieving flawless makeup looks, color correction has become an essential technique in every makeup artist’s toolkit. Color correcting involves using different colored concealers to neutralize and balance out various skin concerns such as redness, dark circles, and blemishes. This technique is rooted in the principles of color theory, which helps us understand how colors interact and cancel each other out. In this comprehensive guide, we’ll dive into the world of color correcting, exploring how to use color theory to address common skin concerns and achieve a flawless complexion.
Understanding Color Theory
Before delving into color correcting, it’s crucial to understand the basics of color theory. The color wheel, a visual representation of colors arranged in a circular pattern, is a fundamental tool in this realm. Complementary colors, located opposite each other on the color wheel, have the ability to cancel each other out when combined. For example, green cancels out red, orange neutralizes blue, and so on.
Addressing Common Skin Concerns
1. Redness
Redness and irritation are common skin concerns that many of us face. To counteract redness, opt for a green color corrector. Green, being the complementary color of red, effectively cancels out the unwanted red tones on your skin. Choose a lightweight, creamy green corrector and gently pat it onto the areas with redness. Remember to blend it out seamlessly before applying your regular foundation.
2. Dark Circles
Dark circles under the eyes can make us appear tired and aged. To combat this, consider using a peach or salmon-toned corrector. These colors work well on light to medium skin tones, as they neutralize the bluish undertones of dark circles. If you have deeper skin tones, opt for an orange corrector. Apply the corrector in a triangular shape under your eyes and blend the edges for a natural finish. Follow up with a concealer that matches your skin tone to complete the look.
3. Blemishes and Hyperpigmentation
Blemishes and areas of hyperpigmentation can be effectively concealed using color correcting techniques. For red or inflamed blemishes, reach for a green corrector as mentioned earlier. However, for brown or dark spots, a peach, orange, or even a yellow corrector can be beneficial. These colors help to neutralize the uneven pigmentation, allowing your concealer and foundation to provide a smoother and more even coverage.
4. Dullness
If your skin is looking dull and lacks vibrancy, a lavender or purple corrector can work wonders. Purple, the complementary color of yellow, helps to counteract sallowness and brighten up the complexion. Apply a sheer layer of lavender corrector to areas that need a little extra radiance, such as the high points of your face. Remember to blend well and avoid overdoing it, as purple correctors can be quite pigmented.
5. Undertone Adjustments
Color correcting isn’t solely reserved for concealing specific concerns; it can also be used to adjust undertones and create a balanced canvas for your makeup. For instance, if you have a cool undertone and your foundation appears too warm on your skin, a touch of lavender corrector can help neutralize the warmth. Similarly, if your foundation is too cool for your warm undertone, a hint of peach or orange corrector can help balance things out.
Mastering the Technique
Now that you’re familiar with the different color correctors and their uses, it’s time to master the technique itself:
- Prep your skin: Begin with a clean and moisturized face. Applying color correctors on a smooth canvas ensures seamless blending.
- Choose the correct corrector: Identify your specific skin concern and select the appropriate color corrector. Remember the color wheel and choose the complementary color to neutralize the issue.
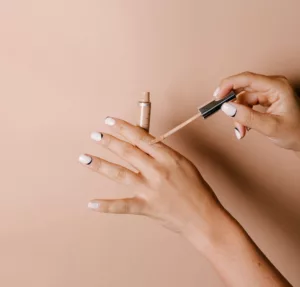
- Apply sparingly: Color correctors are highly pigmented, so start with a small amount. You can always build up the product if needed.
- Blend, blend, blend: Gently tap and blend the corrector using your ring finger or a makeup sponge. The goal is to seamlessly blend the corrector into your skin without leaving any harsh lines.
- Conceal and layer: After color correcting, apply a concealer that matches your skin tone over the corrected areas. Blend the concealer carefully to create a natural finish. If necessary, you can also layer your regular foundation on top.
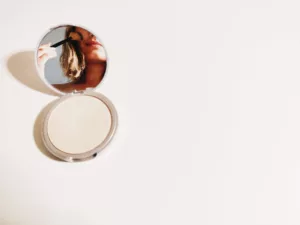
- Set with powder: To ensure your hard work stays in place all day, set your color-corrected areas with a translucent powder. This step helps prevent creasing and ensures long-lasting coverage.
Final Thoughts
Color correcting is a powerful technique that allows you to achieve a flawless complexion by effectively addressing various skin concerns. By understanding color theory and the principles of complementary colors, you can create a balanced canvas for your makeup application. Remember that practice makes perfect, so don’t be discouraged if it takes a few tries to get the hang of it. With patience and the right products, you’ll be well on your way to mastering the art of color correction and enjoying a radiant, even-toned complexion.